This bread turned out soooo good! My husband and I both agreed that we would eat it if gluten weren't an issue. There are no eggs, dairy, or soy in this recipe either. It turned out light and fluffy, which is unusual for the typical loaf of gf bread. This one is a keeper! I got the idea for this bread over at What Life Dishes Out, dairy and eggs are used in that recipe so I changed to to be vegan.

I used the sorghum hazelnut flour blend that I posted earlier

GF dough is more like a batter. So I scrape it into a bread pan with a spatula and smooth the top. I highly recommend this technique of greasing the pan, adding parchment paper, and spraying it with oil again.

I cover the dough with plastic wrap which has been sprayed with a little oil.
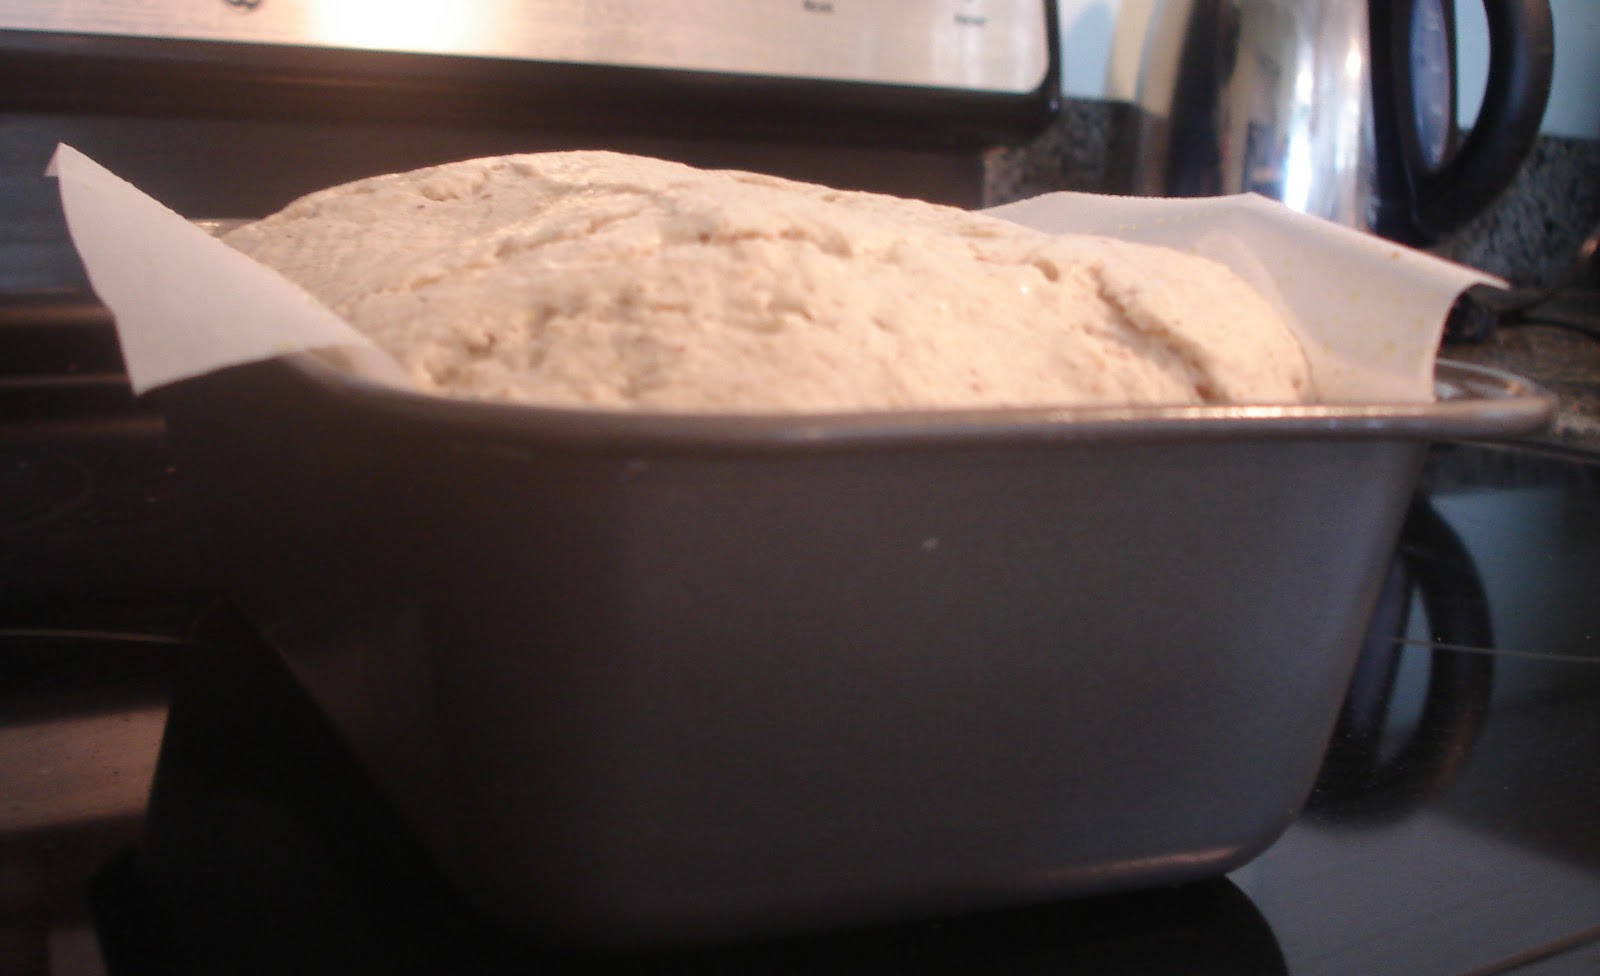
Once it has risen to the top of the pan I bake it. This can take 25 minutes to 60, depending how warm your home is.

Bake in the oven for 55-60 minutes. Don't let the bread sit in the pan too long or it will get soggy. Remove the bread after 10 minutes and allow it to continue cooling on a rack.

Grab both sides of the parchment paper and lift. The bread should come out very easily without any trouble at all! This method is great for brownies and other bars, they are so much easier to cut this way.

After it has cooled for about an hour and 30 minutes it's ready to be sliced. An electric knife and bread slicer allow for even, professional looking slices.

I was surprised that I was able to bend this bread and it didn't break!

I then used some soy free earth balance and apricot preserves to really enjoy this bread.
Dry Ingredients
2 1/2 Cups flour blend (see below)
1/3 Cup brown rice flour or teff flour
2 Tbs flax meal or psyllium powder
1 Tbsp Xanthan Gum
1 tsp Salt
1 Pkg Active Dry Yeast (2 1/4 tsp)
Wet ingredients
1 cup warm unsweetened coconut milk (any non diary milk will work)
3/4 Cups Warm Water (110 degrees)
2 Tbsp melted coconut oil
2 Tbs apple sauce
*Sorghum Hazelnut Flour Blend*
2 cups sorghum flour
2 cups tapioca flour
1 cup hazelnut flour or buckwheat
|
Spray a 9x5 bread pan with oil. Place parchment paper so that it lays on the bottom of the pan and flows over two of the sides. Spray again and set aside.
In a large mixing bowl whisk all of the dry ingredients together.
Mix the wet ingredients together on the stove top on low heat until 110 degrees. Or until is warm to touch, like I did.
Pour the wet ingredients into the dry and use a mix for 3-5 minutes. A hand mixer works just as well as a bosch or kitchen aid.
Scrape the dough into the greased bread pan and smooth out the top.
Spray plastic wrap with oil and lay over the top. Let the bread dough rise until it reaches the top of the pan. Can take 20-60 minutes depending how warm your house is.
Remove the plastic wrap, place in the center of the oven and bake at 350 degrees for 60 minutes.
|
Here is an update on the bread slicing guide I use. It's made by West Bend. I didn't see any on their site but I did see some on eBay. Mine was a passed down from my parents and I'm not sure where they originally got it.

2 comments:
This bread looks delicious! I was wondering if you could share the name of the bread slicing guide you have. I did a quick search online and found a few but the reviews were bad. People said the slices come out too thick for sandwiches. The picture of your bread looks perfect. Thanks!
Thank you! The bread turned out delicious and having slicing guide really does help slice the bread evenly along with an electric knife. I just updated this post with info on where to buy one. The brand is West Bend. Good luck!
Post a Comment