Saturday, November 5, 2011

Jambalaya

This is a dish that has so much flavor! Plus it fills you up and warms you up on a chilly fall day. The husband loved it and told me I can make this anytime (translation make this once a week please). So get out your largest pot and cook up some good ol jambalaya!
Also this recipe can be found on Real Food Wednesday, along with other great dishes!


Ingredients: 
  • 1 Tbsp ghee or butter
  • 1 cup brown rice
  • 3 cups hot chicken or fish stalk
  • 2 Tbsp extra virgin olive oil
  • 1 onion, chopped
  • 2 bell peppers, any kind, seeded and chopped
  • 2 celery stalks, chopped
  • 3-4 garlic cloves, minced
  • 1 lb chicken breast, cubed
  • 6 oz andouille smoked sausage, chopped
  • 2 tsp paprika or Bay seasoning
  • 15 oz can of diced tomatoes
  • 1 tsp oregano
  • 1-2 tsps red pepper flakes
  • 3 bay leaves
  • 12 large jumbo shrimp or 30 small
  • 2 Tbsp fresh parsley, chopped


Directions: 

  1. Heat the ghee in a large skillet. Add 1 cup of brown rice and stir until lightly toasted. Move into a very large pot and add in the chicken or fish stalk. Bring to a boil and then turn the heat down to low. Let the rice cook for 40 minutes before adding in the other ingredients.
  2. Then heat 1 Tbsp of extra virgin olive oil on medium heat in the same skillet used for the rice. Add in the onion, bell peppers, celery, and garlic. Stir and cook for about 8-10 minutes until the vegetables have softened. Add this to the large pot of rice.
  3. Use the skillet again to heat up the other Tbsp of extra virgin olive oil. Add the chicken and sausages and cook for 8-10 minutes or until lightly browned. Sprinkle the paprika or Bay seasoning over the meat and cook for another 30 seconds.
  4. Turn the heat down to low-medium heat, then pour in the can of diced tomatoes. Stir in the oregano, red pepper flakes, bay leaves, and shrimp. Let simmer for 8-10 minutes until the shrimp are cooked through. Pour into the large pot along with the parsley.  Gently stir until the ingredients are mixed together.
  5. Transfer to a large serving dish (optional), garnish with fresh herbs, and serve
  6. Total cook time is about 1 hour and 10 minutes. 

Tuesday, October 11, 2011

Thai Green Chicken Curry with Veggies

I love curry and I can't seem to get enough curry these days (pregnancy cravings in full force). I've made 3 different curry dishes in 3 days. This one was really good. As well as the lentil curry I made today, maybe I'll post that one tomorrow.


Ingredients:
  • 3 Tbs coconut oil
  • 1/2 an eggplant, sliced into thin bite size pieces
  • 2 carrots, peeled and sliced into thin pieces
  • 1 red bell pepper sliced into strips
  • 1 Tbs ginger, grated
  • 2 cloves garlic, diced
  • 1 tsp red pepper flakes
  • 2 large chicken breasts, cubed
  • 1 1/2 cups of kale, chopped into small pieces
  • 1 can of canned coconut milk (use full fat not light)
  • 3 Tbs Thai green curry paste
  • 1 1/2 Tbs Thai fish sauce
  • Fresh Thai basil or cilantro diced to garnish (I preferred it with cilantro, Tyler liked the basil)
  • Serve over rice or rice noodles.
Directions:
  1. Soak the eggplant in salt water for 10 minutes (this will take out the bitter flavor). Make sure the eggplant is completely covered with salt water. I had to put a bowl on top of mine to press it down in the water. Drain and rinse the eggplant.
  2. Heat the coconut oil in a wok, or large skillet. Add the carrots, eggplant, red bell pepper, ginger, garlic, and red pepper flakes. Sauté for 5 minutes.
  3. Add the chicken and Kale. Cook for about 5 minutes or until the meat is starting to color.
  4. Pre-stir the coconut milk and then pour it in.  Stir in the curry paste.  Cover and let simmer  for 12 minutes.
  5. Stir in the fish sauce and serve over rice noodles or brown rice. Top each dish with basil or cilantro.
  6. *note, we added a little cashew milk to ours in addition to the coconut milk. We felt it needed more liquid. Any type of milk could be added to thin it out a bit. 

Sunday, October 9, 2011

"Cream" of Chicken Soup

This is the perfect substitute for Cream of Chicken soup. The taste and texture are spot on! However the health benefits of this one includes high protein, high fiber, and no processed ingredients. Whereas a certain name brand contains processed ingredients like soy, oil, milk, and other filler chemicals that I'd rather not eat.

This recipe makes a large batch so I usually just freeze what I don't need and then thaw a container out before I need to use it. Sometimes I'll just put the frozen block and other ingredients I'm using in the crock pot and let time take care of the rest.

With this recipe a wheat grinder, blendtec, or dry container vitamix will be needed to make the white bean flour. I've used several different kinds of white beans and they all have turned out great. Cannellini, Great Northern, and Navy are all pretty interchangeable. One time I didn't have enough white beans so I did about half white and half garbanzo and the soup still turned out great! It's pretty flexible.

Also you will find this recipe on Kelly's site for Real Food Wednesday and Sunday Night Soup. Check it out for other healthy recipes!

 Bring chicken broth to a boil

 Whisk in white bean flour until thick

Cook your favorite dish using cream of chicken
  soup. 

Ingredients:
  • 6 cups of chicken broth OR 4 cups chicken stock and 2 cups of filtered water
  • 1 cup white bean flour
  • Add in options: cooked chicken, sautéed mushrooms, sautéed onions, any cooked veggies, or herbs/spices
Directions:
  1. Bring the chicken broth or stock/water mixture to a boil. 
  2. Then whisk in the white bean flour. Lower the heat and stir for 3-5 minutes or until the "cream" of chicken is thickened to your liking. 
  3. Now you can let the soup cool and freeze what you won't be using (this is what I do), or add in pieces of chicken, mushrooms, or veggies and then place into containers to freeze. I prefer to do my add ins later since I don't always know what I'll be making. 

Tuesday, October 4, 2011

Maui Zaui Pizza

Saturday was pizza night at my house growing up. We aren't talking grab the phone and wait for the pizza boy to deliver it. We are talking my dad would grind the flour, make some amazing dough, and we would have a plethora of ingredients to top the pizza's off with. Some of my favorites were BBQ Chicken, Vegetarian, Pesto n Shrimp with Feta Cheese, and of course my all time favorite Maui Zaui.

I had Maui Zaui at a friends house and I went home and told my dad he had to recreate it! So for a very rare dinner we went out to Round Table and ordered the Maui Zaui and we all agreed it needed to join our weekly pizza party menu. The secret is the sauce, which is just sweet chili sauce that you can get in the oriental section at the grocery store. 

 GF pizza dough waiting for some toppings

Maui Zaui Pizza, my all time favorite

Maui Zaui Pizza Toppings:
  • Sweet Chili Sauce
  • Mozzarella Cheese (regular or daiya if allergic)
  • Canadian Bacon
  • Bacon (pre-cook it before putting on pizza, but not too crispy)
  • Green onion
  • Red onion
  • Tomato 
  • Pineapple 
GF Crust: I found the best recipe at Gluten Free Day

  • 4 1/2 tsps instant rise yeast
  • 1/2 tsp sugar
  • Blend 1 cup quinoa, 1/2 cup brown rice, and 1/2 cup teff
  • 1 tsp salt
  • 3 Tbs psyllium Husk powder
  • 1  cup warm water
  • 3 Tbs olive oil


GF Crust Directions:

  1. Whisk the yeast, sugar, flour blend, salt, and psyllium husk powder in a large bowl.
    • Or you can soak the flour blend overnight  by mixing it with 1 cup of water with 1 tsp of lemon juice or vinegar to remove the phytic acid. It's an extra step but you will absorb more vitamins and minerals
  2. Whisk the warm water and olive oil together.
  3. Add the oil/water to the dry ingredients and mix for 5 minutes. You can use a hand mixer, Bosch,  or Kitchen Aid. If you are using your strong arm and a spoon mix for 10 minutes. 
  4. Form a ball and place in a dark warm place for 20 minutes.  Get your toppings ready while the dough rises.
  5. Preheat oven to 400 degrees with a pizza stone. Place parchment paper on a pizza sheet and use a greased rolling pin to roll out the dough. Add your toppings and place the pizza in the oven. Bake for 20 minutes for thin crust or until the crust has browned and the center of the pizza is bubbling. 
Note: I recommend rolling the dough out thinner than you think is normal. It rises significantly, and my family likes a thin crust. You can see in the two pictures I posted how much it rises. I rolled the dough out as thin as I normally like my pizza (I wasn't sure it would rise a whole lot.) Then if you look at the finished pizza you can see the crust puffed up quite a bit, it was thicker than we normally like. 


Monday, September 26, 2011

Buckwheat Hazelnut Pancakes

This recipe is originally from Whole Life Nutrition. I made a few changes. First I used EnerG-Egg Replacer instead of eggs since my body can't tolerate them right now. Second I soaked the buckwheat and hazelnut meal the night before in a mixture of 1 cup rice milk and 1 tsp of lemon juice. Read more about the benefits of soaking grains HERE. One last note is that I have made this same recipe by swapping out the buckwheat flour for a mix of teff and quinoa flour, it tasted just as good.

Quick note on soaking that I learned this week from my NTA course:
Soak, sprout, ferment, or naturally leaven all seeds, nuts, and grains.

  • All grains contain phytic acid in the outer layer of bran.
  • Phytic acid combines with calcium, magnesium, phosphorus, sodium, and zinc in the intestinal track and blocks their absorption.
  • This can lead to serious mineral and bone loss.
  • Soaking grains allows enzymes, lactobacilli, and other organisms to break down and neutralize the phytic acid, allowing us to access the nutrients in grain and digest them effectively.
  • Did you know that the original instructions on Quaker Oats called for overnight soaking? Maybe I should start a petition to have them put it back on the label!


    I tested some of the batter in the waffle iron as well. Turned out good as long as the iron was well greased with ghee/coconut oil.

    Ingredients:
    • 1 3/4 cups of freshly ground buckwheat flour
    • 1 1/2 cups of freshly blended hazelnut meal
    • 1/4 cup of tapioca flour
    • 1 1/2 tsps baking powder
    • 3/4 tsp baking soda
    • 1/2 tsp sea salt
    • 3 cups rice milk
    • 1 tsp lemon juice
    • 2 tsps egg replacer (or 2 eggs)
    • 4 Tbs water
    • 3 Tbs honey
    • 3 Tbs melted coconut oil


    Directions:
    1. Mix 1 1/2 cups of rice milk with 1 tsp of lemon juice. Whisk this into the buckwheat flour and hazelnut meal. Cover and let soak overnight at room temperature.
    2. In a small bowl whisk the tapioca flour, baking powder, baking soda, and sea salt together. 
    3. In a medium bowl whisk the egg replacer with water until frothy and then mix in the honey, coconut oil, and the remaining 1 1/2 cups of warm rice milk. 
    4. Finally, mix the wet and dry ingredients into the soaked buckwheat-hazelnut mixture, just until combined. Add extra milk if batter seems too thick. 


    Thursday, September 22, 2011

    My Favorite Corn Bread Recipe

    I found this recipe at Whole Life Nutrition, it's the best corn bread recipe I've ever had. I tweaked my recipe just a little bit. Instead of sorghum flour I used a mix of brown rice and buckwheat. Instead of coconut sugar I used raw honey. T Also I soaked the corn meal, buckwheat, and brown rice flour in rice milk with a little lemon juice overnight to reduce the phytic acid.

    This recipe has been shared with Real Food Wednesday, check out other real food recipes on Kelly's blog.

     They are light and fluffy

    Cut in half and spread ghee and honey on for a tasty treat!
    Ingredients:

    • 1 1/2 cups organic corn meal
    • 1/2 cup brown rice flour
    • 1/2 cup buckwheat flour
    • 1/4 cup tapioca flour
    • 1 Tbs baking powder
    • 1 tsp sea salt
    • 1/4 cup flax meal
    • 1/2 cup hot water
    • 1/3 cup honey
    • 1/3 cup melted coconut oil
    • 1/3 cup applesauce
    • 1 1/2 cups rice milk


    Directions:
    1. Whisk the corn meal, brown rice flour, and buckwheat flour together in a large bowl.
    2. Mix 1 cup of rice milk with 1 tsp of lemon juice. Pour into the dry ingredients and mix until damp. Cover let sit overnight or for 12 hours.
    3. In the morning preheat the oven to 350 and grease muffin pans
    4.  In a small bowl mix tapioca flour, baking powder, and sea salt together.
    5. In a medium bowl mix together the flax meal, hot water, honey, coconut oil, applesauce, and 1/2 cup of rice milk.
    6. Whisk in the wet ingredients with the soaked corn meal mixture. Then mix in the tapioca flour mixture as well.
    7. Fill the muffin tins to the top and bake for 25-30 minutes, when the tops start to become golden brown. Let cool for 5 minutes and then remove from the pan to cool further. 

    Sunday, July 24, 2011

    End of the Week Crock Pot Soup

    Towards the end of the week I often have a mix of different veggies and meat that I don't want to waste. So I throw it all in the crock pot and and have a delicious soup for dinner. It's a great way to get a lot of nutrients, use up leftovers, and take a break from cooking after a busy week. I make a lot of chicken stock that I keep frozen so I toss one that in with it and I end up with a great soup. 

     This picture was taken after we had eaten so there are plenty leftover for lunch the next day


    Each batch is going to turn out a little different depending on what I have in my fridge, but so far we haven't had a batch that we disliked.

    This particular batch had chicken stock, canned tomatoes, carrots, sprouted lentils, sprouted black beans, zucchini, kale, onions, garlic, basil, and chicken sausage.

    Find more great recipes on Kelly's Blog,  Real Food Wednesday

    Friday, July 8, 2011

    Baked Oatmeal

    I saw this idea of making baked oatmeal for breakfast over on Kelly the Kitchen Kop's blog. I made a few changes to make a version that I think my family would like (we aren't the biggest raisin fans). One of these mornings I'll make her original recipe though because I want to try it. The great thing about her recipe is it's quite versatile. Apples can be replaced for any other fruit of your liking and raisins can be traded out for different types of dried fruit. One of these days I want to make one with blueberries and black berries. Actually the more I think about it the more combinations I keep coming up with!

     Baked oatmeal in a 9x13 ceramic dish

    Ready to eat! My husband pours milk on his and I enjoy topping mine off with walnuts or pecans


    Ingrediants
    2-1/2 cups oats (regular, steel cut, or both)
    1-3/4 cups buttermilk, yogurt, or 1 Tbs lemon juice mixed with water
    1/2 cup coconut oil
    1/4 cup flax meal + water until it has the consistency of an egg (or use 2 eggs if not allergic)
    1/3 cup real maple syrup
    1 tsp baking powder
    1/2 tsp sea salt
    2 tsp cinnamon
    2 tsp vanilla
    1 cup dates pit removed and chopped
    2 cups unsweetened, chunky apple sauce
    Pecans or walnuts to sprinkle on top (optional)

    Directions
    Soak the oats in buttermilk or lemon juice over night.
     In the morning Beat the coconut oil, flax meal mixture, and maple syrup together.
    Add in baking powder, sea salt, cinnamon, vanilla, and apple sauce. Beat together until well combined. Then stir in the dates and oats.
    Pour into a 9x13 baking dish and bake at 350 for 40-60 minutes.
    Let cool for 10 minutes and serve. 

    Thursday, June 30, 2011

    Salsa Verde Enchiladas with Sheep Cheese

    We love spicy food in this house, and tonight I knew exactly what I needed to give me a kick. Enchiladas! Also be sure to check out Kelly's Real Food Wednesday for more great ideas!!!

    Enchilada's are best when topped off with a little cheese. I am sensitive to cow's milk but not to goat or sheep so I decided to try using one of those. Goat cheese would be too strong for these enchiladas so I didn't use it. However there are several sheep cheese varieties that have the taste and texture like cow's milk. At Whole Foods the cheese experts helped me find one that would go well with enchilada's and they were right! The Brigante Pecorino Pinna was perfect for this dish. It melted nicely, and the flavor was somewhere between a mild cheddar and havarti. For those that are sensitive to any dairy then Daiya cheese would also work. 

    Ingrediants: sheeps milk, rennet, enzymes, and salt

    Also, I have noticed that I can tolerate some cultured dairy (from cows) in small amounts. So tonight I had about a tablespoon of Nancy's cultured, full fat sour cream along side my enchiladas. If I go overboard I will get a stomachache and my eczema will flare up. 

    On another note full fat is important because low fat food replacements take out the fat and put fillers and sugar in place of them. Wouldn't you rather eat real food instead of some filler or more sugar? Plus, "those that are on low fat diets for a long time may be at risk for depression, low energy, weight gain, and mineral deficiencies" -Sally Fallon, Nourishing Traditions.

     Salsa Verde Turkey Enchiladas before getting baked

    Enchiladas finished baking and topped off with sheep cheese. I didn't bake the cheese because I didn't want to kill the enzymes

    Ingredients
    Extra Virgin Olive Oil
    16 sprouted corn tortillas
    1 lb ground turkey or shredded chicken
    1 medium onion, chopped
    5 cloves garlic, minced
    1 carrot, shredded
    10 leaves of kale, chopped with stem removed
    2 jalapenos, diced
    1/2 Tbs cumin
    1/2 Tbs chili powder
    16 oz salsa verde
    1 1/2 cups raw cheese, shredded (I used sheep-Brigante Pecorino Pinna)
    1/2 cup cilantro, chopped
    1 avocado, sliced
    Cultured, full fat sour cream (optional)
    9 x 13 baking dish, greased

    Directions


    Enchilada Filling: In a large pan sauté the onion, garlic, and carrot in some olive oil. Add it to a large mixing bowl and set aside. In the same pan cook up the ground turkey, jalapenos, and stir in the cumin and chili powder. When the turkey is almost done mix the kale in until it wilts. Add the turkey mixture to the onion mixture and stir together until combined.
    Soften the Tortillas: Fry the corn tortillas in a little olive oil to soften them, don't let them get crispy or they won't roll up. Another method is to steam the tortillas so that they become soft. Choose whichever method you prefer. Sometimes it's nice to do half steamed and half fried.
    Bake or Freeze: Next scoop some enchilada filling into a tortilla, roll it up and place it seam side down. Do this until the greased baking pan is filled up. At this point the enchilada's could be frozen or baked. If baking, pour the salsa verde over the enchilada's, cover, and bake at 325 for 30 minutes or until they are steaming. At this point sprinkle the cheese over the top of the enchiladas, cover and let them sit in the warm oven for about 5 minutes or until the cheese melts.
    Serve: with cilantro, avocado, salsa, and cultured-full-fat-sour cream

    Saturday, June 25, 2011

    Meatloaf with lentils and veggies

    The secret to my tasty meatloaf is to add in leftovers. I had some organic kale and sausage from the previous day as well as fiber from juicing vegetables for a morning health drink. It proved to be a great way to give my meatloaf a nutritional boost and add flavor as well. 

    Instead of using 2 lbs of grass-fed ground beef I used 1 lb and the other lb was replaced with sprouted lentils. This saved money since lentils cost pennies compared to grass-fed beef. Plus Lentils offer plenty of protein, folate, iron, potassium, and fiber. 

     Sauteed celery and onions

     Sprouted lentils cooked with tomatoes, onions, and garlic for 10 minutes.
     Meatloaf is a great way to use up leftovers. I had some sausage and kale that needed eaten up so I blended it up with some garlic. 

     1 lb of grass-fed ground beef, 1 lb of sprouted/cooked lentils, tomatoes, onions, celery, kale, organic sausage, garlic, and fiber from juicing carrots/summer squash. 


     Instead of doing the typical meatloaf in a bread pan I baked them in a greased muffin pan. 

     After they have baked for 45 minutes they are ready to eat. Not the prettiest picture (I'm not a photographer by any means) but they tasted great, in fact we didn't even use ketchup!


    Meatloaf

    1 lb grass fed ground beef
    1 lb of  sprouted lentils
    15 oz diced tomatoes
    2 Tbs ghee
    1/2 onion, diced
    2 garlic bulbs
    2 celery stalks, chopped
    1 cup kale, chopped
    2 carrots, shredded (in this case I used fiber from juicing veggies)
    1 oz Italian sausage (optional)
    1/4 tsp cayenne pepper
    1/4 tsp ground black pepper
    1 tsp sea salt
    1 tsp of dried basil
    1 tsp of fresh rosemary, diced
    4 Tbs of Flax meal + water
    1 1/2 cups gluten free bread crumbs (I used roughly blended oatmeal)

    Directions
    Soak the lentils for 12 hours. Drain and rinse 3 times over 24 hours or until they have sprouted.
    Cook the lentils with 15 oz of diced tomatoes. Since they are sprouted it should only take 10 minutes.
    Sauté the onion, celery,  garlic, and kale in 2 Tbs of ghee. Place in a food processor and blend so it is chunky. Don't puree it.
    Preheat oven to 350
    In a large mixing bowl  combine all of the ingredients.
    Grease muffin tins and scoop the meatloaf into each cup and shape the top smooth. Bake for 45 minutes or until the temperature reads 170. 

    Sunday, June 19, 2011

    Strawberry Rhubarb Pie

    My parents came up to visit and attend the 2011 Herb Fair at Bastyr with me. They also brought me items some butternut lettuce and rhubarb from their garden. Butternut lettuce isn't like your typical romaine or leafy green, it literally melts in your mouth with each bite you take. I made a wonderful salad with tomatoes, red onion, celery, sugar snap peas, and avocado. Then topped it off with *crispy walnuts and a dijon mustard vinaigrette. Lettuce grows really well in Seattle, so I'm thinking that after I harvest my spinach I'm going to plant some butternut, because it is just wonderful.

    *Sally Fallon has a wonderful recipe for crispy nuts in her book Nourishing Traditions. It takes out the phytic acid and allows the body to absorb more nutrients. Basically by soaking the nuts and then making them crispy in a food dehydrator or the oven on a low temperature.

    Recently, I was asked to teach a gardening 101 class at church. I grew up helping my parents garden but I am not a master gardener or even close to being one. In fact I could probably benefit from attending some gardening classes. Overall I think it went well, the women told me afterwards that after my presentation they felt they could try growing an herb garden or make some sprouts in their kitchen. Most of us are students here and don't have room for anything but a few planter boxes so I think it went well.

    To thank the women that came to the class I made a strawberry rhubarb pie, using the rhubarb my parents had brought me from their garden. The pie turned out delicious, especially after it was topped off with whipped cream made from coconut milk.

    I couldn't do a nut based crust like I usually do since one of the girls there has nut allergies. This one is a mix of ground oatmeal, brown rice flour, quinoa flour, vanilla, and organic palm shortening. I didn't measure it out so I don't have an exact recipe.

    I didn't have 2 pie pans so I decided to make it in a large dish. The crust got a little over cooked this way but it still tasted great. However next time I'll make sure to use 2 pie dishes if I double the recipe. 

    Strawberry Rhubarb Pie


    FILLING

    • 3 cups chopped red rhubarb, fresh
    • 3 cups largely chopped strawberries
    • 1/2 cup organic Turbinado sugar
    • 1/2 cup organic brown sugar
    • 3 tablespoons minute tapioca
    • 1/2 teaspoon lemon zest
    • 1/2 teaspoon lemon juice
    • 2 dashes of cinnamon
    • 1 teaspoon vanilla extract
    • 3 tablespoons coconut oil or ghee

    Mix the rhubarb, strawberries, sugar, tapioca, zest and juice of lemon, dash of cinnamon, and vanilla. Mix well in a large bowl and pour out into chilled crust. Dot the top of the filling with the ghee or coconut oil.

     Roll out the other pie dough and cover the top or cut out shapes with cookie cutters. Crimp to seal edges.

     Bake at 425 degrees F for 15 minutes. Decrease temperature to 375 degrees F and bake for an additional 45 to 50 minutes, or until the filling starts bubbling. Higher altitude will take 450 degrees F and 400 degrees

    Sunday, May 15, 2011

    Vitamina de Abacate

    This smoothie was made with avocado, lime juice, frozen banana, non-dairy milk, spirulina, and stevia

    This avocado smoothie is such a treat! My recipe is based on the one that my dad used to make for me growing up. He fell in love with it in Brazil, there they call it vitamina de abacate. There are a few different ways it can be made so I'll share some different options. 

    First peel a banana, slice it up and place it in a small Tupperware container and freeze it. I usually keep several bananas in the freezer because I use them in smoothies. If the banana isn't frozen the texture of the smoothie will be goopy instead of creamy. (picture from google images)

    slice an avocado and add it to the blender. (picture from google images)

    Squeeze in lime or lemon juice. I usually use a lime but a lemon will also work

    Scoop a teaspoon of spirulina. A handful of spinach or kale can also be used. 

    Add 8 oz of yogurt for a thick smoothie or 8 oz of milk for a thin smoothie. I like both ways, it just depends on what I feel like at the time I am making it. 

    I use Bellwether Farms sheep milk yogurt since I am sensitive to cows milk. Goat milk yogurt has too strong of a flavor for me. For milk I use my own nut milks since I am allergic to cow's. Even when I make a smoothie using yogurt I add a little milk as well, otherwise it won't blend.


     Delicious!

    After I blend the smoothie I taste it. Sometimes I add a few drops of stevia. Usually the banana makes it sweet enough, however now and then it needs a little something extra. Raw honey or turbinado can also be used. 


    Vitamina de Abacate (Avocado Smoothie, serves 2)
    1 frozen ripe banana, sliced into 1/2 inch pieces
    1 avocado
    Juice of 1 lime or lemon (optional)
    2 cups plain full fat yogurt or milk of your choice
    1 tsp spirulina or 1 handful of spinach/kale
    A few drops of stevia or 2 medjool dates


    Peel, slice, and freeze 1 ripe banana. Add the banana and the rest of the ingredients (except for the sweetener) to the blender. Blend until smooth and creamy. Depending on the size of the banana and avocado it may need a little extra milk to help it blend. Taste to see if it needs sweetener. If it does add a few drops of stevia or a tsp of raw honey and blend one more time. Pour into two 12 oz glasses and enjoy!

    I posted this on Kelly the Kitchen Kop's blog for her Real Food Wednesday post! Check it out to see other blogger's recipes for real food!

    Sunday, May 8, 2011

    Chicken and Rice with a Tropical Twist

    I have been going to Bill the Butcher to get quality meat. Their meat is different from what you will buy at any ol grocery store, just read their following statement.

    "Bill the Butcher believes in supporting sustainable farming practices and working with local farmers and ranchers who raise beef, pork and poultry without hormones, steroids and genetically modified feed. We also feature open pastured organic and natural grass fed beef that has not been artificially and intentionally fattened on corn. This gentle and natural diet creates meat that is high in Omega 3 and 6 essential oils and is far healthier than traditional beef raised in a feedlot."


    I can feel the difference as well. Last year I was vegan. Before that I tried to eat healthy but knew something was off. (Have you ever realized that the typical low fat diet is a high sugar diet?) After I read the China Study I went vegan. Then my body went really out of whack and I found out I have food intolerances to a lot of vegan food. I have been doing more research and have started to follow a traditional food diet (with a few alterations) and I am noticing a difference. 


    In September I will be taking an 8 month course through the Nutritional Therapy Association. They use Nourishing Traditions by Sally Fallon in their teachings so in a year I will have a lot more knowledge than I do now. I am constantly reading and doing research on my own when it comes to nutrition and I am excited to finally have experts give me some guidance. 


    I cooked chicken with fresh pineapple, rice, and other veggies to make this fun dinner!

    I doubled the recipe so I had to combine everything in a large mixing bowl. Brown rice, sautéed onions, garlic, ginger, red bell pepper, chicken broth, and red pepper flakes all mixed together.

     Caramelized fresh pineapple

     I cut the pineapple in half and scooped out the fruit. It was trickier than I thought it was going to be. The first half I scooped out I completely destroyed. I was smarter with the second one. I cut it up before trying to scoop

    I topped it off with chopped up cilantro but didn't get a final picture of it because we were hungry. There is more filling than the pineapple can hold so it was served in another dish.

    Pineapple Chicken and Rice
    1 cup brown rice. Soaked, drained, and cooked
    1/2 onion, chopped
    1 Tbs fresh grated ginger
    3 cloves of garlic, minced
    1 tablespoon red pepper flakes
    1 red bell pepper, chopped
    1 cup peas
    1 organic chicken breast
    1/4 cup chicken broth
    1 fresh pineapple + 1 can of pineapple
    1/4 cup Pineapple juice
     sesame oil
    fresh cilantro, chopped

    Directions
    1. Soak the brown rice for 24 hours in water and 1 tsp of vinegar. This will reduce the phytic acid making it easier to digest and allowing more vitamins/minerals to be absorbed. Drain and rinse the rice and cook in 2 cups of water with a tsp of olive oil.
    2. Drizzle the chicken breast with some sesame oil and pineapple juice. Wrap it in tinfoil and bake it at 350 for 20-30 minutes until it's 160 degrees and no longer pink in the center.
    3. While the chicken and rice are cooking prep all the veggies. Chop the onion, chop the pepper,  mince the garlic, slice up the pineapple, chop of the cilantro,  and set the peas out to thaw.
    4. Sauté the onion, garlic, and ginger in some sesame oil. Set aside.
    5. Sauté the red bell pepper for  2 minutes but don't overcook it. It should still be firm. Set aside.
    6. Sauté the pineapple so the sides get caramelized.
    7. When the rice is done mix in all the sautéed veggies and thawed out peas. Add the red pepper flakes, chicken broth, and pineapple juice.
    8. Shred the chicken and mix it in as well. Fill the empty pineapple with the chicken-veggie-rice mixture and top with cilantro. The extra filling can be served in a separate dish.      

    Friday, April 29, 2011

    Spirulina Berry Smoothie

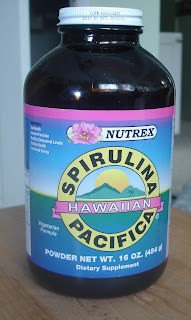
    I've been adding 1 tsp of Spirulina to my smoothies these days. It is full of protein, iron, vitamins, antioxidants, and important fatty acids. You can learn more about the health properties here

     In this smoothie I used a banana, frozen mixed berries, spirulina, non diary milk, and a little lemon juice. 

     It's super tasty and is even husband approved in the taste test. Trust me, he has no problem telling me that some of my creations just aren't gonna work....This one passed the test!

     The berries hide the spirulina, but it's in there I promise! 


    Monday, April 25, 2011

    Banana Chocolate Cream Pie

    There is a pie that I have been drooling over for quite a while now. My birthday was on Saturday so I knew it would be the perfect dessert to celebrate with. I used the recipe from The Spunky Coconut she creates gluten free, casein free, and sugar free recipes that are absolutely delicious. I have made several of her dishes and haven't been disappointed yet.

     mixing up flax meal, coconut oil, applesauce, and honey for the crust

     blended walnuts and coconut flour are also mixed in

     The pie dough is ready!

     press it into the pie pan

     bake it up

     blend cocoa powder, dates, banana's, and chia seeds together

     Let it chill for several hours and add the birthday candles

     Make a wish

    Dig in! I received a whip cream dispenser for Christmas and if I put canned coconut milk in it I get whipped coconut cream! It all tasted so good!